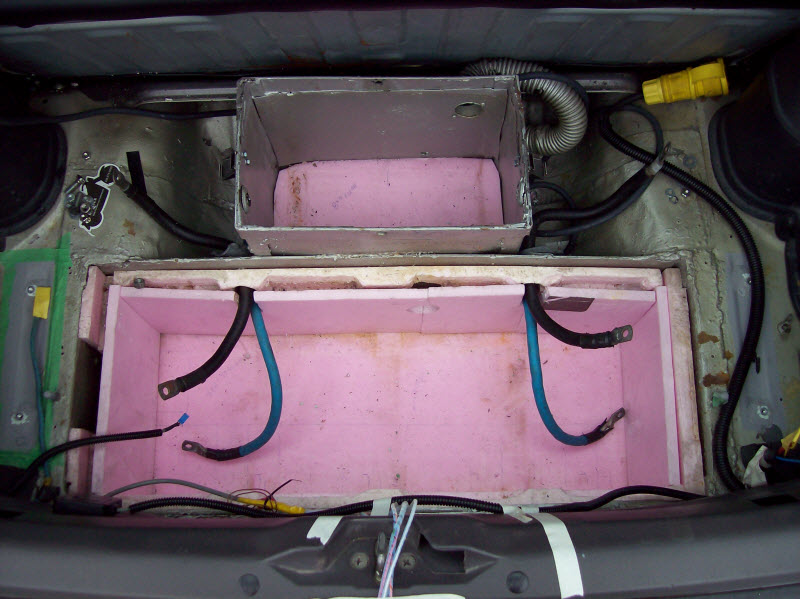
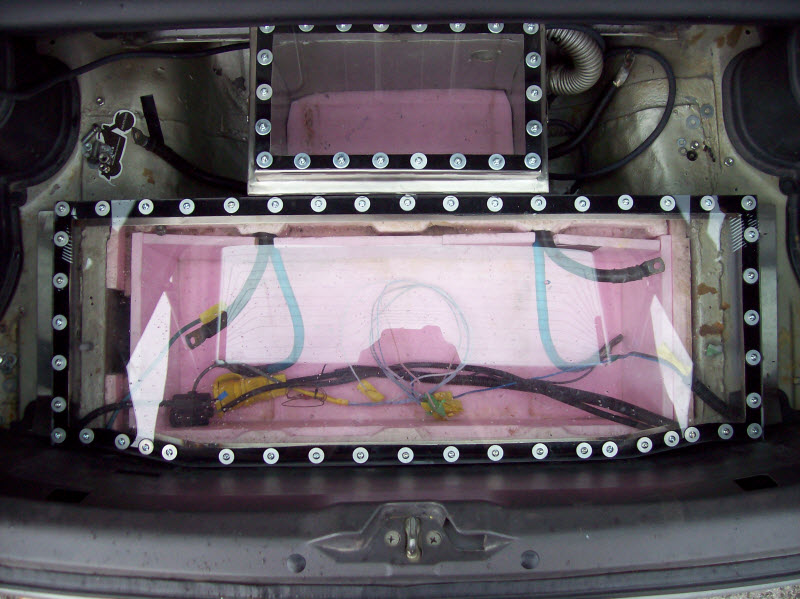
Not yet finished - but on it's way - finally! After having the Battery Box Covers made up for the rear Battery Boxes (long ago!) - I have finally got started on getting them fitted!
The single battery box - required the total removal of the battery to proceed, so I had decided to take them all out - and have them tested, and cycled and tested again - to see what they would deliver for rated energy! One of our exhibitors for EV Fest 2012 has a 4-Battery cycle and test rig, so he has them at the moment.
Since I had the batteries out - I started work on getting the cover installed for the single.
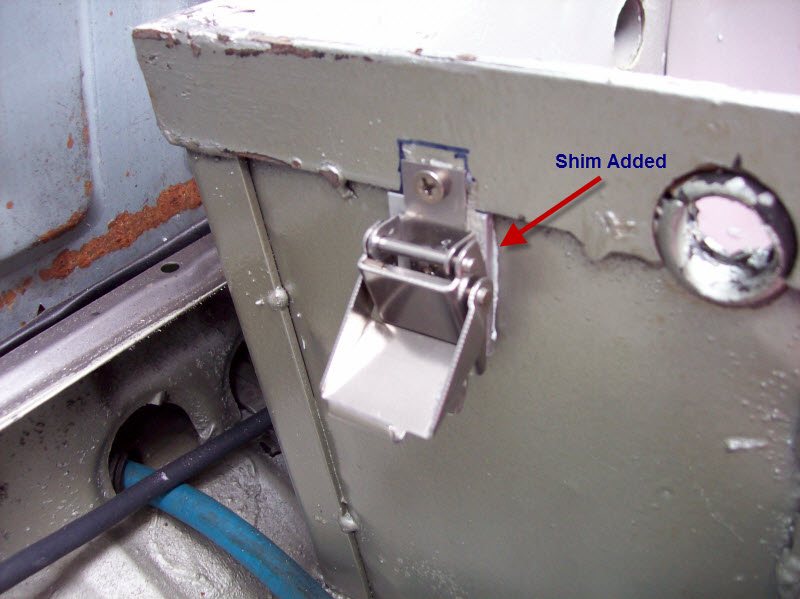
There was a flat strap around the edge - but not wide enough to hold the clamp down bracket - so I cut two pieces of 1/16" x 1" flat aluminum bar about 1.25" long, and secured them in place using 'Mighty Putty' Epoxy that I had, clamped them in place, and let them cure for a day.
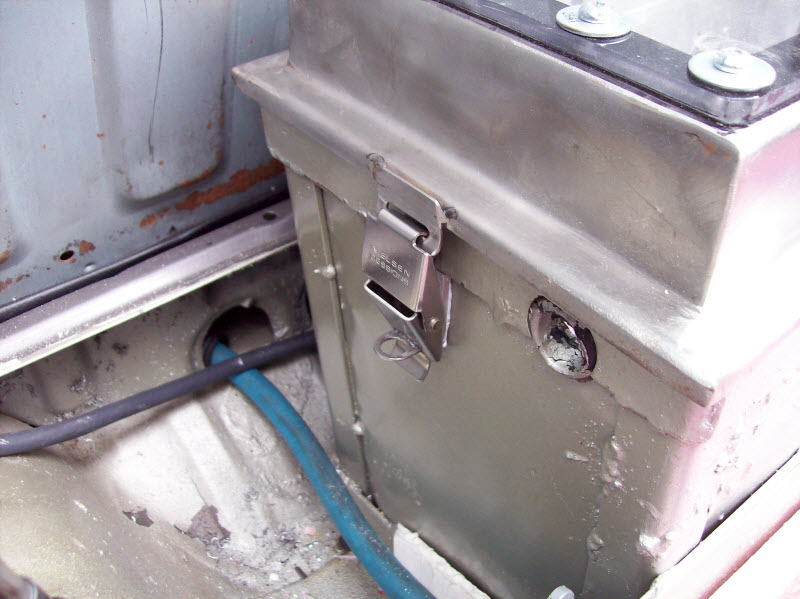
Then I used special Double Sided Sticky sheets, to temporarily hold the clips in place, aligning them by putting the lid on and clipping them to the closed position. After Carefully unlocking the lid, I clamped the clips in place one by one, and drilled first one hole, then bolted it and checked the cover fit - tweaking it for any alignment needs, before clamping the clip again to drill and bolt the second hole. I Did the same on both sides, then finished to tighten down the bolts.
With the single Battery Box Cover in Place - I began to deal with the issues of the main Rear Battery Box Cover and it's fit.
First - were the aft most flat edges, being at 90 degrees - they were scraping the plastic trim that was not in place when they were welded up, so I had to do some trimming and fitting - for a few fit cycles to get that right.
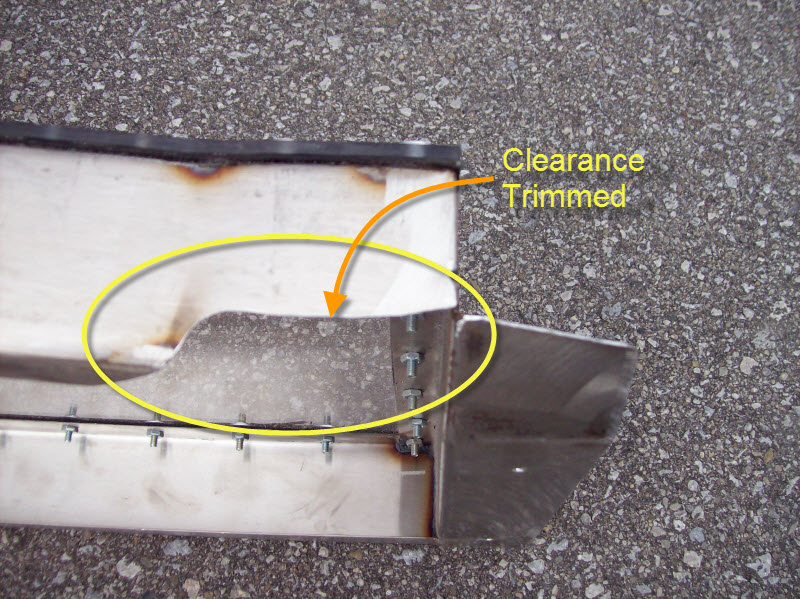
Then - was the issue of wire bundle clearance under the rear corners, and after hack-sawing, and grinding a few times, - I came up with cutting a much larger clearance, so I cut away more material, and used the 1" rotary File to Grind away and radius the corners for a safer, smoother clearance with fewer sharp edges.
Next - was the issue of the 4 original holes - that we first drilled in the side flanges along it's center-line, but they were along the edges of a dip, and on the side - where the hole - while vertical - would end up tipped inward on all 4 holes if I simply inserted the desired screw-nuts. So I decided to again get out the Mighty Putty - and simply use it to fill and level the space. First - I took my Wire Wheel (Actually - a synthetic replacement) in a 3" Dia. and using the Drill - I cleared away - Paint, Rust inhibitor, and underlying Rust, before using a small steam cleaner to cleanse the area of fine particles, dust, and crud. Drying that first with paper towel, and then my heat gun, I was then ready for the Might Putty!
After cutting 4 pieces of thin coat-hanger sized rod to insert in the 4 holes, I mixed the putty - one hole at a time, and then forced it into the depressed area an around the rod, wiggling the rod to keep the hole clear, and patting it down to make a basic Level condition. It was not until I got to the last hole - that I thought to use a stiff plastic Spreader - to pat it down in a true flat surface! (The others were already too hard to mold any more by that point.)
After letting them cure for about 10 more minutes - I got out the Heat Gun again - and gave them a bit of acceleration. Then - I started to mask off the area around each sides two holes, and once that was done - I shot them again with rust Primer, for a few coats and let them cure for another day!
After Removing the masking and paper, I chose the size of Screw Nuts (10-24), and drilled the insert hole for them. Unfortunately - I only had handy 1/4" drill bits, and needed a bit larger. So - I took a Round file and began to work the holes to make them larger - until the screw nut just slipped in.
Unfortunately - I made one hole a touch too large, and so - after installing the screw nuts, and fitting the cover, and testing the fit with bolts - the loose one pulled up. I will have to get a fresh one - and start again - but likely use a bit of fresh Mighty Putty with the install - or some other Epoxy - and let it cure before testing the tightening again!
Here are the two covers in place - with the smaller Single Batter Box Cover forward, and the large - 4-Battery Cover Aft:
Once that test fit is in place - the next step is to secure spacers for the flanges - using 1/2" thick Pink Builders Extruded Foam, adhesives, and Epoxies, etc. to set up a hard and level offset to raise the cover flanges up so as to clear the wiring that enters the battery box from the back face.